How Is Luggage Transferred on Connecting Flights? A Comprehensive Guide
As participants in Amazon Associates and other programs, we earn from qualifying purchases. This comes at no additional cost to you. For more details, see our Affiliate Disclosure.
Have you ever wondered what happens to your luggage when you take a connecting flight? How does it get from one plane to another, and how can you be sure it will arrive at your final destination? In this comprehensive guide, we’ll take a closer look at the process of luggage transfer on connecting flights. From check-in to baggage claim, we’ll explain each step of the journey and provide tips to help ensure your luggage arrives safely and on time.
The Check-In Process: Tagging and Routing Your Luggage
When you check your bags at the airline counter, the first step in the process is tagging and routing your luggage. During this phase, airline staff will attach a luggage tag to your suitcase, which contains important information such as your name, flight number, final destination, and a unique barcode. This barcode is scanned at various points throughout the journey to ensure your luggage is on the right track.
After tagging, your luggage is placed on a conveyor belt that takes it through a series of security checks, including X-ray machines and potential manual inspections. Once cleared, your bags are sorted based on their final destination and flight connections.
If you have a connecting flight, your luggage will be routed to the appropriate connecting flight’s baggage area. Airlines use sophisticated computer systems to track and manage the flow of luggage, ensuring that your bags end up on the right plane. It’s important to note that you don’t need to collect and re-check your bags during layovers, as the airline will automatically transfer them for you.
During check-in, make sure to provide accurate and up-to-date information regarding your flight itinerary. This will help avoid any confusion and ensure your luggage reaches the correct destination.
From Plane to Plane: How Luggage is Transferred
The process of transferring luggage from one plane to another during a layover is a complex operation that requires precision and efficiency. Upon landing at your layover airport, your luggage is quickly unloaded from the plane’s cargo hold.
Luggage designated for transfer is separated from those whose final destination is the current airport. This is achieved by scanning the barcodes on the luggage tags, which provides information about their next destination.
The separated luggage is then transported via special vehicles, conveyor systems, or automated guided vehicles (AGVs) in some high-tech airports, to the next plane. The time-sensitive nature of these transfers means that ground crew members work swiftly to ensure that all luggage makes it onto the correct flight. It’s a meticulously timed process since the luggage needs to be loaded onto the next plane before it departs.
In case of a tight connection, airlines prioritize the transfer of luggage to ensure it makes it onto the next flight. However, if the connection is too tight, the luggage might be put on a later flight, which is one of the reasons why some luggage arrives late.
All these processes are mostly automated, with human intervention kept to a minimum to reduce the chances of error. Despite the complexity, the process is generally efficient, ensuring that your luggage reaches its destination in sync with you.
Arrival at Your Destination: Claiming Your Luggage
Upon arrival at your final destination, your luggage goes through a similar process as at the connecting airport, but this time, it’s destined for the baggage claim area instead of another flight.
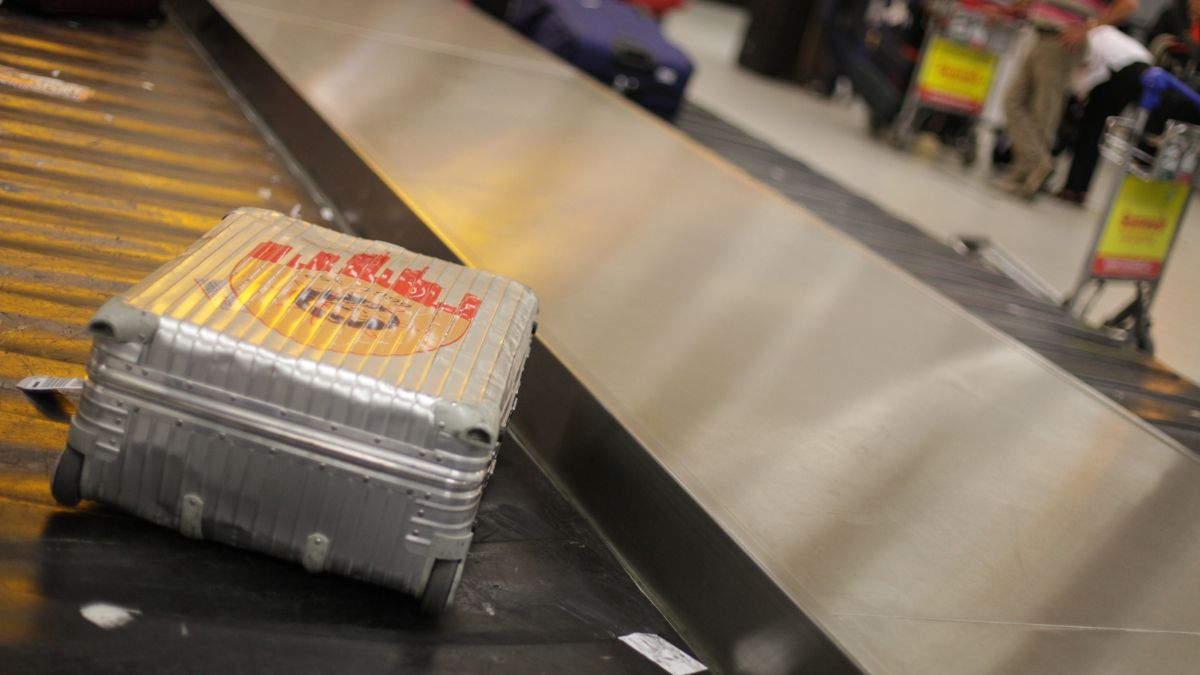
Once the plane lands, ground crew members unload the luggage from the cargo hold. The bags are then transported to the baggage claim area of the airport, often via a system of conveyor belts. Your luggage’s barcode is scanned once again to ensure it’s directed to the correct carousel corresponding to your flight.
At the baggage claim area, you’ll find a series of carousels, each assigned to a specific flight. Information screens will inform you which carousel your luggage will be available on. Once your luggage appears on the carousel, you simply collect it and proceed through customs if necessary.
In the rare event that your luggage does not arrive, head to the airline’s service desk in the baggage claim area. They can use the information from your luggage tag to track its location. Most often, if luggage is delayed, it will be delivered to your home, hotel, or designated address at no extra charge.
Remember, it’s crucial to keep your baggage receipt until you’ve collected all your luggage, as this is proof of your checked luggage and will be needed in case of any issues.
Common Issues with Luggage Transfer and How to Avoid Them
While the process of transferring luggage from one flight to another is generally reliable, issues can occasionally arise. Here are some of the most common problems and tips on how to avoid them:
- Delayed Luggage: This is one of the most common issues with luggage transfers. It usually occurs when the layover between flights is too short, and the luggage doesn’t make it onto the connecting flight in time. To minimize this risk, try to book flights with a reasonable layover time. Most airlines suggest a minimum of 45-60 minutes for domestic connections and at least 2 hours for international connections.
- Lost Luggage: Although rare, sometimes luggage may be lost in transit. This typically happens due to errors in routing or tagging. To avoid this, double-check that the airline staff has correctly entered your final destination when you drop off your luggage. Also, make sure your luggage is properly tagged and keep the sticker receipt you are given—it’s proof that your luggage was checked in.
- Damaged Luggage: Baggage can sometimes be damaged due to rough handling or the rigors of travel. To prevent this, use sturdy, high-quality luggage, avoid overpacking, and consider not checking in fragile items. Instead, carry them in your hand luggage.
- Theft: In very rare cases, items may be stolen from checked luggage. To minimize this risk, never pack valuable items like jewelry, electronics, or important documents in your checked luggage. Keep these items in your carry-on bags.
- Misplaced Luggage: Sometimes, bags can end up on the wrong carousel due to mistakes in routing. If you can’t find your bag, check the other carousels and report the issue to the airline if you still can’t locate it.
Remember, most luggage issues are rare, and airlines work hard to ensure that your bags arrive safely and on time. However, being aware of potential issues and taking steps to avoid them can help make your journey smoother.
Tips for Ensuring a Smooth Luggage Transfer
While the process of transferring luggage is largely out of your hands once you’ve checked it in, there are a few steps you can take to help ensure your luggage has a smooth journey:
- Pack Smart: Don’t pack valuable or fragile items in your checked luggage. These should be kept in your carry-on bags. Make sure all items in your checked luggage are secure and won’t move around during transit, which could lead to damage.
- Tag Your Luggage: Make sure your luggage is properly tagged with your name, phone number, and address. It’s also a good idea to put the same information inside your luggage in case the outside tag gets lost. Some travelers also recommend tying a colorful ribbon or unique tag to your bag to make it easily identifiable.
- Choose Appropriate Layovers: When booking your flight, ensure there is enough time between connections for your luggage to make the transfer. The suggested layover time is usually at least 45-60 minutes for domestic flights and 2 hours for international flights.
- Check the Luggage Tags: Before leaving the check-in counter, double-check that the airline representative has correctly tagged your luggage with the right destination. The three-letter code on the tag should match the one for your final destination.
- Keep the Receipt: Always keep the luggage receipt given to you at the check-in counter until you retrieve your luggage at your final destination. This contains a unique tracking number for your luggage and is needed in case of any issues.
- Consider Travel Insurance: If you’re traveling with high-value items, consider purchasing travel insurance that covers lost or delayed luggage. This can give you additional peace of mind.
By following these tips, you can help ensure a smoother journey for your luggage and a less stressful travel experience for yourself.